
Over at Bushcraft USA they have a Bushclass, one of the class electives was to make a cobra weave paracord bracelet. Now I'm not a knot tying genius and after getting through the first one it is quite easy and a lot of fun, giving you a convenient way to carry at least 8 feet or more of usable paracord on your wrist depending on the style. There are many different variations on how a bracelet is made with different weaves and buckles and knots, but this is the method I'm currently using as it is functional and simple.
As a picture is worth a thousand words I tried to set up the knots so that they can be done by following the different colored cordage in the order that I make them in with measurements of the cut pieces to minimize waste.
The Two cut lengths are
28" inches for the wrist lanyard
8' feet 2 1/2" for the cobra weave
Starting with the 28" piece you tie a lanyard knot in the end, I like this knot as it makes a nice looking round ball to use as the "button".


The free end of the paracord passes underneath the standing part forming an underhand loop.

The other end passes under the orange loop you've made, around the free end and goes over under over.
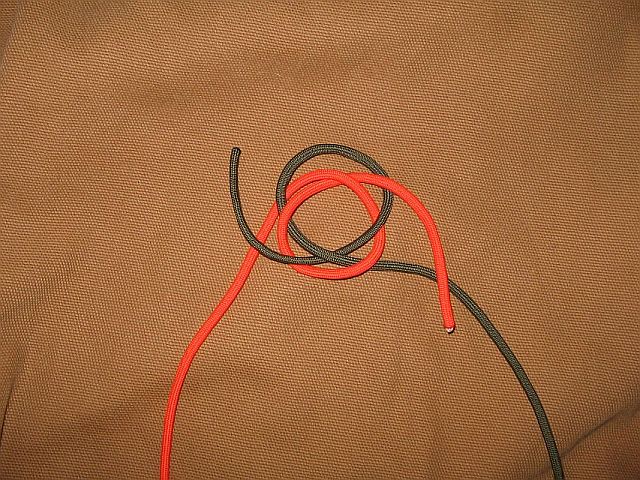
To make this easier I rotate the work slightly to get the free ends to pass over their opposite standing ends.

And up through the center.

This is the underside of the knot showing how the free ends come up through the center.

This is the finished knot, don't pull it up tight yet as it can be reworked to adjust to your wrist size.
Once you get the knot done you can adjust it to your wrist size by adjusting the strands of the knot, keep in mind that you want it a little large as some of the diameter is reduced by the cobra weave. I also make final adjustments after I'm finished with the cobra weave before pulling it tight

Part two, The Cobra Weave
Stay Safe
Bob


